In the Loop: How Microsoft Loop Revolutionized my Daily Workflows
Welcome to In the Loop, a blog series on Microsoft Loop by Scott Low
It was Never Supposed to Come to This
When I first heard about Microsoft Loop, I’ll admit that I was skeptical. I was hard-pressed to think of a way I’d benefit from embeddable collaboration surfaces in apps like Teams, Outlook, and Office. I was also a happy OneNote user. Having tried other apps like Notion, I couldn’t imagine switching to anything else.
Fast forward almost a year, and I couldn’t imagine my life without Loop. Never before has a single app made such a dramatic impact on my daily productivity workflows. These days, I’ll talk about Loop to anyone who will listen and have had colleagues start to refer to me as the “Loop Guru”. The idea for a blog began when folks started scheduling time on my calendar to learn more about Loop. To my surprise, the idea seemed to be a hit, so here we are.
Welcome to In the Loop!
Maybe you’ve never heard of Loop, or maybe you have and you’re wondering (as I was) how it could be applicable to you. Or maybe you’re a power user and can teach me some new things. Regardless, I hope this series teaches you something new and helps you think about how you can integrate Loop into your own daily workflows. Before diving in, it’s worth starting with a quick Loop primer.
What is Microsoft Loop?
At its core, Microsoft Loop is an app centered around collaboration. I often find it helpful to think of it as a stacking doll with three distinct parts. Starting from the inner-most doll and working out, these parts are as follows:
Loop Components
Loop Components are the fundamental building blocks of Loop. They can be created both within the Loop app and an increasing number of Microsoft apps such as Teams, Outlook on the Web, and Whiteboard. You can think of Loop Components as live (and I mean live—there is almost zero latency) updating canvases. Once created, you can capture your ideas by inserting text, images, tables, and even other Loop Components. You can see the full list of insertable items and templates by typing /.
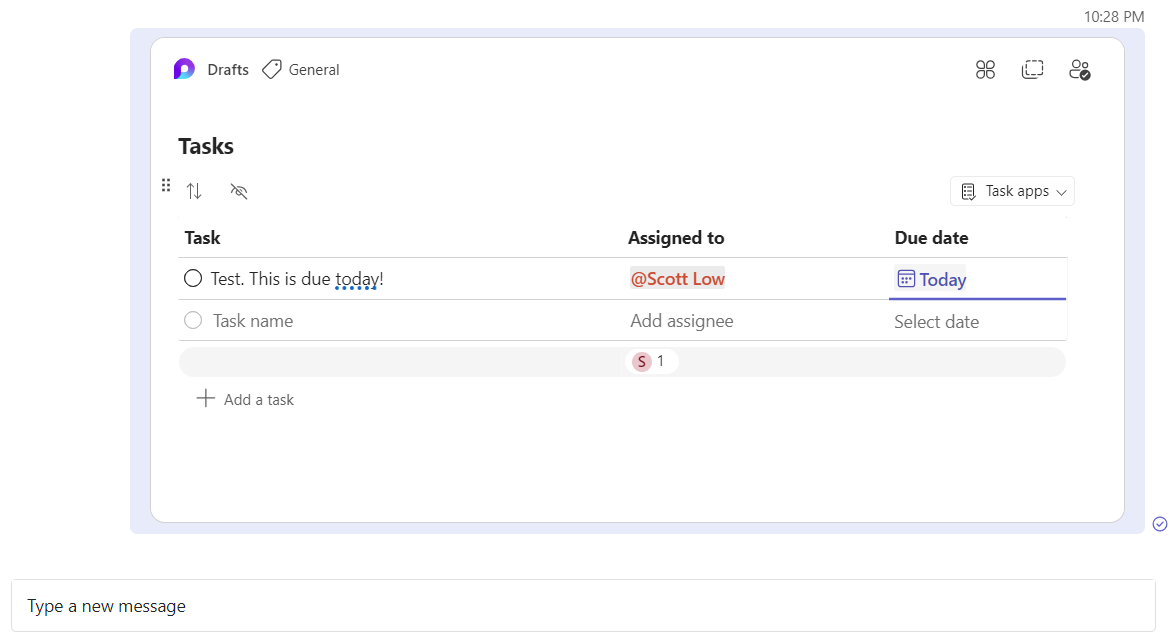
The neat thing about Loop Components is that they expand when shared. This means that anyone you share them with can view and edit them directly in the flow of work. Here’s an example of a Loop Component pasted in a Teams message:
Any changes made to a Loop Component in one place will be instantly reflected anywhere that Loop Component is shared.
Loop Pages
Loop Pages are individual pages that can be created within the Loop app. Each Loop Page is also a Loop Component, meaning that it will behave exactly as described above.
Workspaces
If you’ve used OneNote, you can think of Workspaces as Notebooks. They help organize Loop Pages by disparate topics. Like Notebooks, you can keep them private or share them with others to collaborate at scale.
Before We Begin
If you’re on desktop, I recommend navigating to https://loop.microsoft.com to access the Loop App. Once there, you can install it as a web app by clicking the “Install App” button in the address bar. I find that using the Loop app is necessary, as it’s difficult to keep track of Loop Components otherwise.
How I organize Loops could be the topic of its own post, but here’s a few quick tips I’ve found helpful:
I create new Loop Components in the Loop app rather than inline in Teams/Outlook. This creates them as a Loop Page I can easily revisit, instead of an ephemeral component I’m likely to lose track of. In the event that I do lose track of a Loop Component, the “Recent” tab in the Loop app is a lifesaver.
If I do create a Loop Component in Teams/Outlook, I’ll add it to one of my Workspaces in the Loop app using the “New link” option. The same goes for any Loop Component I’m sent that I know I’ll want to reference again later:
I use a combination of nested Loop Pages and Emoji icons to organize my Workspaces. Kudos to whoever on the Loop Product Team that made the call to implement Emojis early!
Loop has some great getting started documentation if you're interested in learning more. Now, let’s dive into the first of many game-changing use cases I’ve found for Loop. I have plenty more of where these came from, so stay tuned for future posts where I’ll share even more use cases, tips, and tricks.
Task Lists: Closing the Loop (😉) on Meeting Notes
When I was a OneNote user, my note-taking flow for meetings looked like the following:
Take notes on a dedicated page somewhere in my personal (or a shared) notebook.
Summarize key takeaways and action items from the notes in a bulleted list.
Send that bulleted list to meeting participants in a follow-up mail after the meeting.
Add any action items assigned to me to my to-do list.
This flow had a couple key friction points:
The list of action items I’d send to participants after the meeting was static. No one receiving the list had a way to know when tasks were completed short of manual follow up with task owners.
Manually adding tasks to my to-do list was a painstaking process. I can think of more than one occasion where I missed a follow up because I forgot to copy a task from notes to my to-do list.
Enter the Microsoft Loop Task List
The Task List feature of Microsoft Loop completely changed this flow for me. A Task List can be added to any Loop Component by typing /Task List. Once created, tasks can be assigned to anyone in your organization using a simple @ mention. Due dates can also be assigned with a couple clicks:
The game changing thing about Task Lists, however, is the fact that they sync with Microsoft To Do. Whenever I assign a task to myself, I rest easy knowing it'll pop up almost immediately in the "Assigned to Me" tab of To Do. Assigning a due date will move the task to the “Planned” tab and will pop it up in the “My Day” view on the day it’s due as well.
But what if someone isn’t a To Do user? No worries! Assigning a task to them will trigger periodic email reminders to keep them informed.
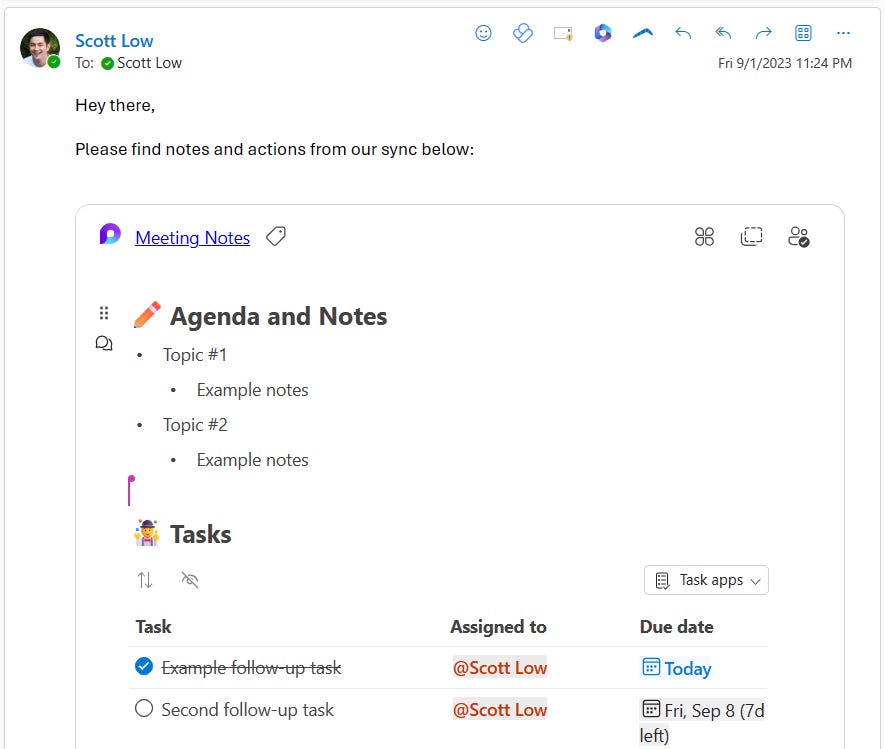
Another nifty aspect of the To Do integration is the fact that it’s bi-directional. Completing a task in To Do completes it in its corresponding Task List and vice-versa. This comes in handy when sharing meeting notes in mail. Now, rather than sending a static list of action items, I can embed a dynamic list of tasks directly inline:
This makes it simple for anyone catching up on meeting notes to see the latest takeaways and progress against tasks without leaving the app they’re currently in.
Wrapping Up
Loop’s integration with To Do and Outlook dramatically streamlined my note-taking flow. Tasks are now auto-populated in my to-do list the moment I add them, meaning I’m less prone to miss an action item. Notes I embed in mail also remain editable after sending, letting me tweak them later if I spot an error.
Finally—and we’ll get into this in more detail in the next post in the series—I appreciate the flexibility Loop offers for sharing meeting notes. They can be sent in mail, but they’re also integrated into every meeting in Teams if folks prefer to look there. If folks want a copy of notes to their personal Workbooks, they can use the "New link" option I mentioned above. This is something I do to keep recurring meeting notes organized. Of course, regardless of where they're shared/saved, each copy is always up to date.
If you've made it this far, thanks for reading the first installment of In the Loop. If you have any questions, comments, or feedback, please feel free to reach out! To wrap up, I'll leave y'all with one extra bonus tip below. Until next time!
Bonus Tip
One of my favorite things about Loop is how easy it is to insert links. Gone are the days of right clicking and selecting "Insert Link" or pressing Ctrl + K if you're used to hotkeys. Now, all you need to do is copy a URL from somewhere, highlight the word or phrase you want to turn into a link, and press Ctrl + V to paste it in. Loop is smart enough to know there's a URL on the clipboard and turn what you've selected into a link. It’s not an exaggeration to say that I smile every time I do this and I've been doing it for months.


